Tuesday 31 May 2011

My Current Make-Up Regime – Finale – Little Extras

Almost time to cue credits on “My Current Make-Up Regime” sob sob. Never fear, this is the best bit :0)

Apart from using my “favourite” items to do my make up for a special event, I also like to take my time, and enjoy the process. I’m aware I may be sounding like a weirdo right now, but I really do enjoy putting my face on, and when I get the luxury of extra time, I make sure I enjoy it to the full! I have a cup of tea by my side and some trashy TV on in the background and get everything laid out ready to go, but enough rambling about me and onto the products that add that extra zing.

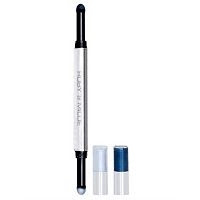
Ruby & Millie I-Powder pen in Black and Silver


It’s all about eyes really when you want to make an impression isn’t it. Unfortunately, I don’t have the best skill or face for eye shadow, but when I do decide to do “daring”, I use the fabulous Ruby & Millie I-Powder pen, which is essentially for beginners. You can buy it in larger boots stores and the blurb taken from the Boots site explains it perfectly:

Ruby & Millie I-Powder Pen can create many different looks and is totally foolproof. There is no need to worry about dosage; the lid will automatically apply the right level of powder. Better still you have all the benefits of a loose powder eye shadow, without the worry of excess spilling on to cheeks.
One Ruby & Millie I-Powder Pen gives both a dramatic look and a very natural look.

For a classic look:Apply the lighter Ruby & Millie I-Powder shade as a highlighter on the brow zone, using your finger or a brush to blend into the brow. Then apply the co-ordinating darker shade to the eye lid, blending the two shades together where they meet.

For drama:Layer on the colour with two or three swipes of the nib, the darker shades in particular will give a stunning effect.

For a more fresh faced natural look:Simply apply once to the eye lid and then blend with finger or brush.

For a smoky eyed look: Experiment with the Black and White shades. Blending these two shades together gives a striking silver effect.

Here’s how it looks on me, remembering I told you I don’t have much skill in the eye shadow application department!

Barry M  Dazzle Dust  


Next on my list of little extras, for use when I’m not feeling so daring, are the Barry M Dazzle dusts. My favourite is Silver Iridescent but I don’t think there are many of them I don’t like. It’s a very small pot of loose sparkly eye shadow – easy to apply, great for Christmas and evening wear, there are 75 colours to choose from, and they cost £4.59 a pot in boots. Winner :0)


Too Faced Candlelight Powder

Finally, we have the too faced candlelight powder which is basically a translucent powder with a subtle gold shimmer throughout. The promise it makes is to:


“Capture the ethereal glow and ultra flattering light of a romantic candlelit dinner, anytime. Apply this multi-tasking, breathable, vitamin-enriched powder onto fresh skin or over foundation to set make-up and impart a soft-focused glow.

A powerful dose of skin-saving antioxidants help to protect and soothe tired skin, while the golden-peachy tone warms illuminate your complexion reducing the appearance of fine lines and imperfections. “

Sounds good eh?! Does it live up to all that? Well, it’s not quite all that, but it definitely feels like a decadent product and when I finish with a light sweep of this powder I can see a little bit of the ‘glam’ me in the mirror, so job done. 

The only area uncovered by the “little extras” category is my lips – anyone know of a good shimmery lip gloss that isn’t sticky??!

Saturday 7 May 2011

My Current Make-Up Regime – Part 4 – Blush & Lips

Blush

You’ll have seen from my post on 29th January 2011 that I love my Benefit Posie Tint for blusher, and nothing has changed there. The only trouble is that I sometimes forget to put it on before my powder (I’m still trying to get out of the habit of putting blusher on last), and then it’s too late as it creates a funny texture when mixed with powder and using the powder on top also sets it nicely so it’s more matt.

So, when I  have my forgetful head on, I use my second favourite blush which is Prestige Skin Loving Minerals Fresh Glow Baked Mineral Blush in Pink. It’s a nice price at £8.49 from boots although it doesn’t come with a brush. If you are looking for a big splotch of colour, this isn’t for you as it’s a really light wash of colour. It can be built up though and could alternatively be used as a highlighter.

Lips

I start with a lip pencil and I have only ever found one that I like – not too harsh looking, easy to draw the line, and blends nicely with my lippy but also gives a nice outline. It’s a Jane Iredale one in Taupe which costs £6.40 and can be bought either online, or in a few beauty salons. I’d rather use nothing if not this, as all the other lip liners I’ve tried are either too dry and hard to draw a line with, too harsh, or the wrong colour completely.


After my lipliner, I again use a product I’ve been loyal to for many years – Maybelline Superstay 24hr lip colour in “615 Soft Taupe”. It’s a double ended product with lipstick on one end and a gloss on the other. I only use the lipstick end but at £8.99 I’m ok with that.

The best thing about this product is that you can layer it depending on how much intensity you want - if you wipe all excess off the brush before using, you get a very sheer nude colour, but if you load up the brush, you get a deep brown, and of course all the variations in between.

This lipstick has the best staying power of any I’ve tried but it doesn’t dry out my lips which is a bonus. I put it on at 6am, and it doesn’t budge until I take it off in the evening.


Instead of the gloss that comes with the lipstick, which I find doesn’t last very long or give any moisture; I use a product called Shine Moisturiser Lip Gloss from lip ink. It’s a bit pricey at £17.50 but lasts about a year and is brilliant – it gives a subtle shine with no stickiness, but also moisturizes well.

And that's me on a normal day! As they say, "Lipstick, Powder and Paint, makes me the girl I aint".  

I add a few little extras for special occasions (next post) which usually means something sparkly hehe.

Happy face painting my fellow beauty addicts :0)

Friday 15 April 2011

My Current Make-Up Regime – Part 3 – All About Eyes


I’m not really one for eye shadow, but not for the want of trying. I just need to accept that I really don’t suit eye shadow of any kind! That said, I do sometimes use a little Mac Eyeshadow in “Blanc Type” (a really nice cream colour) on my lids but only really to brighten my eyes if they are having a particularly “red” day and need a bit more help than just concealer.

So, my first eye step is eyeliner and this is using the Shiseido automatic eyeliner if in a hurry, MAC fluidline eyeliner in Blacktrack if I’ve got loads of time, and on a normal day, Benefit magic ink liquid eyeliner.

 Shiseido automatic eyeliner – you can find full details in my post in January.

MAC fluidline – my all time favourite eyeliner but needs a separate brush to apply and is in a small glass jar so is more time consuming to apply. It does however last the longest out of all three listed here, and is more black than the Shiseido one, and has a matt finish rather than the shiny finish of Benefit magic ink. Its expensive but it lasts ages.


Benefit magic ink – nice handy little pot with in-built brush and it stays on fairly well although it does flake a little towards the end of the day. It’s a little bit gloopy so much care is needed with application to avoid going outside the line you want – probably not for the beginner!

As for mascara, I only have one that I use and am in the market for a new one, particularly if it’s waterproof and especially if it has a tiny brush. Any suggestions welcomed!


I use Chanel Sculpte Cils Longueur Extreme, pricey but worth every penny to me. It lasts about 3 months and the thing I love about it is the tiny brush. It catches every little lash and the staying power is great too. Oh, and it doesn’t hurt to take off, unlike some waterproof ones. It’s not waterproof obviously but it is long lasting and only comes off if I’m having a cry – I mean a real ugly face sobbing session, not just a few tears!

Thursday 7 April 2011

My Current Make-Up Regime – Part 2 – Concealer & Powder

Concealer

If you read my post “Concealer Hunt” then you’ll know that I don’t yet have an ideal one and I’m currently using a bit of a mixture depending on how much time I have and what is to hand.


Maybelline Superstay 24hr Concealer – this is what I use most days as it’s so easy – I dab it over my lips as a base, put a little dot at the nose crease to hide redness, and then sweep a bit over my eyelids, again to disguise redness. Once dabbing is done, and this takes only a few seconds, I rub it all in which again is a really quick process.


Bare Minerals ID Foundation – this comes out when some serious spot coverage is needed! I collect the tiniest amount of powder on the end of concealer brush and just dot it onto any blemishes. This is actually a mineral foundation but I have just never got on with mineral foundations, but I haven’t found anything better for disguising those pesky spots that I soooo should be rid of at my age!


L’oreal Touche Magique-  this is another easy to use product with a simple twist of the tube to get a little product onto the inbuilt brush. It’s a really great colour and really does brighten as it should – great for the under eye area and down the sides of the nose. I don’t consider this an essential part of my routine though, and really only do it when I have bags of time (or just bags!) and/or for a special occasion. 

Face Powder

Sad I know, but this is the bit I enjoy the most – you put on that dusting of powder and you have a nice blank and  as perfect as it gets canvas with which to paint on your style of choice :0)

I did have a very favourite and now much missed face powder by Bourjois. It was Bourjois Pastel Teint Pressed Powder but is sadly no more…. . The Pastel Teint was silky and beautifully soft on the skin, matt enough to cover shine but no cakiness at all, and it even smelt wonderful. I did persevere and continue to buy it on Ebay but alas that soon wore thin. So, I’m currently trialling the two below which so far are pretty much identical and a bit blah.

Gosh Pressed Powder  


Maybelline Dream Matte Powder

Any recommendations for a really nice face powder?

Wednesday 30 March 2011

My Current Make-Up Regime – Part 1 – Foundation

I start the “lipstick powder and paint” process with foundation and then concealer over the top, even though I’m led to believe it’s supposed to be done the other way round. Oh well, it works for me this way is all I can say!

For hygiene and smooth application, I prefer to use my fingers for foundation, but I tend to use a brush most days simply so I don’t have to wash my hands again afterwards – any minutes saved in the morning routine equals more minutes sleeping before the alarm goes off hehe.

I have combination skin, I like a medium coverage and I have several foundations that I like detailed below. I’m certainly not a tinted moisturizer type of gal but neither do I want to look too caked.

Revlon Colorstay Make Up with softflex
This ticks all the boxes for me and has done for some years despite trying probably hundreds of others. It’s a liquid formula, has a pale enough colour that is not too pale, provides good buildable coverage, a choice of one for Combination/Oily Skin or one for Normal/Dry skin, and all at a reasonable price. Oh, and it has SPF6 – not very high but at least it has some. Winner.


Chanel Mat Lumiere Long Lasting Luminous Matte Fluid Makeup (Some mouthful eh!)

Thicker than I would normally use but is good if you are looking for a bit more coverage without it accentuating lines and looking too cakey. It’s pricey though of course being Chanel. It is a pump action bottle which adds brownie points for me.

Mac Studiofix Fluid

This is to my mind almost exactly the same as my favourite, Revlon Colorstay, except that the choice of colours is far superior in Mac Studiofix yet I can’t find as good a colour match as with my Revlon! It does have SPF15 though. Oh and it's twice the price of Revlon.

Clarins Truly Matt Foundation

This is also pretty much like Revlon Colorstay, except a little bit thicker consistency, but it comes in a plastic bottle so I use this as my travel foundation – lighter and easier to fit in make up bag. This one is not quite so forgiving on facial lines if you don’t use it sparingly though!

Using a foundation brush does in my opinion take a bit more blending and also uses a bit more product as some is caught within the bristles.

So, to the process……….after I put my moisturizer on, I start to ‘unpack’ the required items from my make up bag (Ok, ok, I admit it, it’s a big vanity case of stuff, not just a bag). By the time I’ve done that my moisturizer has sunk in just enough and I’m ready to begin with foundation. I put a pea sized amount onto the brush and then quickly dab onto my nose, each cheek, forehead and chin, by which time the brush is almost dry and any leftovers get swept over my eyes. I then just blend blend blend until all the tide lines have disappeared – just a few minutes ‘work’ for a great result :0)

Friday 25 March 2011

Quick Nail Polish Review

Sparitual in “Crystal Water”


2 coats is all that’s needed, great bright colour but unfortunately for me being so pale skinned meant it made my hands look even more deathly white! More suited to dark toned skin. Sparitual Vegan Nail Lacquers have no DBP, Formaldehyde or Toluene.

OPI in “The Colour To Watch”


Interestingly this didn’t work very well on top of my false nails but it worked beautiful on my (natural) toenails. A bit more of a sensible colour if there is such a thing, very feminine and not too bold but with a dash of pearly shimmer to make it more interesting. Takes quite a few coats to get any depth of colour though.

Ciate in “Mistress”


Fab fab fab consistency and a very pretty bottle – great colour with only 1 coat needed. Colour bit too much on the orange side for me but is certainly a lively pop of colour. Not sure where you can buy this brand high street wise though – I got this one free on a magazine. Looking at the website there isn’t a huge array of colours and the nicest ones are sold out.

Monday 21 March 2011

No7 Soft & Soothed Gentle Cleanser for Normal/Dry Skin


You gotta love those £5 off Boots vouchers eh, which for me meant that this cleanser only cost £3 (Any amount of money I can save in Boots is a good thing, I spent a large part of my wages there). The trick is remembering that you have the vouchers though isn’t it, and using them before they expire :0)

Looking back at my current skincare post, you may have surmised that I was happy with my Johnson’s nourishing cleansing lotion and that is indeed true. However, I’m always looking for a product that is even better, and one thing my Johnsons doesn’t do is remove my eye make up. Enter No7 soft and soothed.

I was slightly apprehensive about buying a cleanser for normal/dry skin, when my skin is far from normal and/or dry, but since it worked out best doing it that way with my Johnsons cleanser, it seemed the sensible path. My apprehension was about ending up with even greasier skin and a lot of pimples.

Firstly I have to say that I was pleasantly surprised with the smell of the cleanser, in that it’s almost fragrance free. I have mostly avoided No7 products because any that I’ve tried in the past had a strange dusty old smell to them! (Honestly, check the testers next time you are in boots, it’s really odd).

Ease of use for this cleanser gets top marks as it has a pump dispenser. It doesn’t dispense an awful lot with each pump but that works for me as I usually end up using too much with non-dispenser types.

So, what’s the actual product like? Well, it DOES take off my eye make up easily and as a cleanser it does exactly what it says on the tin – sweeps away make-up and impurities, comforts and hydrates.  I’m a cleanse tone and moisturize girl as you know, and usually my face doesn’t feel “finished” until I’ve completed all three steps, but after using this my skin felt clean and moisturised but not greasy and could have happily been left at that stage. (I didn’t leave it, I’m all about following the skincare “rules” he he).

Now, you know how fussy I am so most products have a downside for me, and for this cleanser it’s that it leaves a film on my eyes after removing mascara etc, so much so that everything looks a bit blurry unless I use a toner over my eyes to finish. Quite a surprising downside since it doesn’t feel that way on the rest of the skin.

My conclusion is that it’s a great facial cleanser, but not £5 better than my Johnson’s (without a voucher it’s £8 and the Johnsons one is £3). If I had another voucher, I would repurchase, mostly for the convenience of the pump dispenser. 

Wednesday 16 March 2011

Acrylic Nails

Yes yes, nails again, I’m all about the nails lately I know. Maybe that’s to do with the diamond recently put on a certain finger :0)

Unimpressed as I was with the silk nails I had done (see my review in February), I decided to go for the much tougher Acrylic. You may recall that my last experience of Acrylic nails was when one of them ripped right off with my natural nail attached to it, ouch. So, Acrylics for me were a brave move but I know they are strong and I know what to watch out for this time!

My salon of choice was Nailzone in Glasgow (Hope St), and from the moment I sat down I felt like I had made the right choice. I knew I’d be leaving with a much better looking set of nails than the sorry excuses I went in with. The salon is very pink and girlie and the girls are smiley and friendly and I got a lovely cuppa before the nail magic began.
You can see the end result in the photo above and I think they look amazing. I can honestly say it’s the best set of false nails I’ve had….ever. The technical work that went on to get them looking like they did was pretty darn impressive too – there is no white tip painted on, and neither is it a false white tip, but rather it is sculpted from white acrylic. 

Perhaps more impressive for my sensitive skin is that I had no cuts or stinging at all which is a first for my poor hands – they usually look and feel like a cats been at them.

It has been 2 weeks since they were done and this is how they are looking now….


The UV Gel top coat that was put on means I’ve been able to put on coloured nail polish and remove when required with no damage or detrimental effect to the French manicure look underneath. Winner :0)
 

Sunday 13 March 2011

Fake Bake Flawless


Yep, that’s right; I had not a single bit of patience and rushed right out to get the fake bake flawless spray, right after my post :0)  So far, I love it. I suspect it may be a tad too dark for my fair skin, but honestly, I don’t really care!

It comes with a pair of gloves and an application mitt which combined make it super easy to apply. You put the gloves on, then put the mitt on one hand and spray the product onto the mitt using your other hand. Next, you sweep the glove over the area you want to tan – it only takes about 4-5 sprays to cover the entire face and neck and maybe 10-12 sprays to cover feet and legs to top of thigh. I imagine that this bottle is going to last quite some time which makes it better value than most fake tans in the same price range. 

It dries almost instantly which is great, but I put it on at bedtime so I can’t vouch for what it would look like under make up. I suspect that it may be too dark – it’s scary dark when it first goes on, my other half was laughing his socks off when he saw me post application. It does come off on pillows/sheets etc, but washes out no problem.

The morning after, a lot of the tan washes off, but not quite as much as with St Tropez. I did worry (when I saw how little was washing off in the shower) that I would look way too tanned but I was pleasantly surprised when I stepped out – it looked as “natural” as a fake tan with a decent colour CAN look!

I would say the colour lasted the usual 4-5 days but the best thing about it was that it faded without becoming patchy. Oh, and it smells gorgeous – like coconut. It's a definate repurchase for me.

See below pictures of before, with the application, and after it's washed off.


Wednesday 2 March 2011

Olay Regenerist SPF 30 Flawless Skin Cream

Finally I got round to dipping into my Christmas book – “Don’t go to the Cosmetics counter without me” and was delighted to find a day cream (Olay)  with an SPF of 30 that was highly recommended. I’m always on the look out for a high SPF day cream that won’t feel too thick and greasy and clog up my skin. In fact, if it helps with shine and mattifies, all the better, as I must admit I have a bit of a “glow” going on in the T Zone usually by late morning!

I had a favourite – Dermalogica oil free matte SPF20 moisturizer. Not only did it mattify, it smelt gorgeous, kind of like a beach (yes really!), but alas they stopped making it. I now use Zenmed oil free SPF30 which I also love, but I can’t buy it in the UK, and have to order it online with crazy postage prices and a long wait for it’s arrival.

Not only does it claim to be fast absorbing and non-greasy, Olay regenerist SPF30 Flawless Skin Cream also promises to protect you from both UVA and UVB rays, whilst bringing you visibly younger and more even-looking skin with its amino-peptide complex. I was full of hope just reading it!

Good Points – the smell is divine, and the cream has a beautiful texture and smooths on like a dream. It does sink into the skin well and doesn’t feel too greasy. Foundation seemed to go on well over the top although I could feel that it wasn’t completely matt. The bottle is a nice size, pretty looking, with a handy pump dispenser.

Bad Points – Price – its £29.99 a bottle. I was also surprised to read a couple of the Boots.com reviews that said they found it non-greasy but then I think there was a mention of dry skin – for me I could feel the difference between this and my usual matt moisturizers within an hour or so. My foundation started to do that awful “gathering” thing and looked and felt like a layer of war paint. Eeeurgh!

The conclusion for me unfortunately is a resounding no good, but I do have to say that it might work for someone with dry skin. There are many days (mostly when a big pimple makes an appearance) that I wish I had that particular problem, but I guess the grass is always greener eh!

Saturday 26 February 2011

Deborah Lippmann “Bad Romance” Nail Polish

(GaGa blackened fuschia -glitter)


With my silk nail extensions still in place (miracle!), but bored of the fading French manicure, I decided to give something different a go. The Bad Romance glittery Gaga inspired polish seemed like just the cookie for me! I'm not sure why it's called blackened Fuschia though, as I thought Fuschia was pink  confused smiley #17452

The bottle is beautiful and the polish itself looks different to other sparkly polishes in that is has larger speckles of glitter, almost like tiny sequins. I was sure it wouldn’t look as great on my nails as it did in the bottle, but as you can see, it aint half bad :0)  

Another problem I envisaged (a pessimist? Me? I don’t know what you mean hehe), was how difficult it might be to apply and to get the glitter bits spread evenly. I was again pleasantly surprised – it’s very thick and I started off with the usual wiping most of it off and painting on a thin layer but that just paints an almost black polish with little glitter. I tried again using a full brushful, and hey presto, one coat is all it takes. It takes a few tries to get the right technique, with a little bit of almost dabbing along the nail, but once mastered, it’s easy as pie. (Not that I’ve ever baked a pie, nor do I think it'd be particularly easy, where DO these sayings come from).

At £16 each, these are not cheap, but I haven’t seen anything else quite like them on the market, so perhaps worth it for special occasions? There are several other yummy sparkly colours pictured below, and they do of course do the usual non sparkly range of colours at £14.  

Only one bad thing to say - it's HELL to remove the polish with the non acetone remover you have to use on false nails. Be prepared to go through a wad of cotton wool and use plenty of elbow grease!


Tuesday 22 February 2011

OMH – OMG!

OMH Therapies – Neck, Back, and Shoulder Massage

I have to tell the world about a wonderful discovery here in Edinburgh. It’s called OMH Therapies and is an oasis of calm, and I don’t say that lightly. Like many people I know, I hold tension in my neck and shoulders, and am eternally on the hunt for a massage therapist that can work out those tension knots. What I’ve found is that there aren’t that many therapists who can really “get in there” so to speak , and even so called Deep Tissue Massages have left me feeling relaxed yes, but still with the same knots and tension.

I’m a highly strung person, always on the move, and don’t usually find beauty salons or spa’s etc, particularly relaxing until the point I’m actually having the therapy, and even then I find it hard to switch my mind off and fully relax. Not so when I entered OMH therapies. You step down one small step and immediately you get the wonderful aroma of incense (not overpowering as can sometimes be the case) and there is a feeling of being welcome. The big open plan space is full of beautiful dark wood, cushions, and therapy chairs and soft background music playing. I was greeted with a genuine smile from Emily, and the team are dressed beautifully in traditional Sari’s which adds to the feeling that you have stepped away from the city for a moment. Emily herself seemed very calm, gentle, and warm which immediately put me at ease.

From the moment the actual treatment started, I felt totally confident in my therapist and managed to immediately relax into it and enjoy the experience. The treatment was gentle but firm, and I could feel the exacts points of tension being manipulated and released but without any pain, in addition to feeling a release in parts of my back I didn’t even realise were tense! By the end I already felt much looser and lighter somehow and the headache I had felt coming on had disappeared.

After the treatment you are given a refreshing cup of water with a hint of orange and mint, and left to gather yourself with no feeling of being rushed at all. The whole experience was a pleasant surprise. Don’t get me wrong, I didn’t expect it to be horrible, but I am so critical that it isn’t often something happens like this that A. makes me so relaxed and so quickly, and B. ticks all the boxes with no criticisms!

Further details here: http://www.omhtherapies.com/

Monday 21 February 2011

Silk Nail Extensions


Having my nail extensions done and maintained used to be as important to me as breathing. Ok, maybe not quite that important, but really really important. I had them done fortnightly and chose acrylic as they were the strongest. One evening, one of my beautiful talons caught on the toilet flush and tore not only the acrylic nail off, but nearly all my natural nail too, leaving horrible looking flesh and a bit of nail bed. Eeeurgh and Ouch!

Since that unfortunate accident about 6 years ago, you can imagine that I haven’t been overly keen on having false nails again! That and the cost of keeping them maintained.

However, I did think it would be nice to have them done for special occasions and the curiosity of the new gel nails proved too much. I have to say that they lasted a long time as promoted, but the downside is that you can’t soak them off yourself but have to go back to the salon to get them removed. (Goodness knows what they use, I tried with pure acetone which works on acrylic but it didn’t budget them) I just waited for them to grow off in the end, not pretty for quite some weeks!

Having a hankering for a new set of nails in the last month or so, I didn’t know what to try, until I found an Edinburgh Salon offering Silk Nails. Doing some research I found that Silk nails are more flexible than Acrylic (by which I interpreted will not take your whole nail with it if it comes off), so feeling brave (or a fool I hear you cry)  I decided to give them a go.

The process of actually having them done  was pretty much the same as with either gel or acrylic, except that instead of a paste or just gel, there was a small square piece of silk put in between two layers of a thinner gel type substance. The whole process took about 1 hour and 40 minutes and was painless. Again, the actual look of them is no different to any other type of nail, and they certainly felt as strong. The picture above was taken 3 hours after having them done.

Unfortunately, by 5 hours post full set, my thumb nail had broken. Putting aside my relief that my own nail was still in tact and I felt no pain, it was quite disappointing. Over the next few days I noticed that it felt rough at the sides on a couple of nails and there was a small indent which if it caught on anything would no doubt break the nail, so I filed them down a bit to smooth them out. This I think has prevented any more breakages.

They’ve been on for a week today and still look pretty good, but because I was too clumsy immediately after the polish and ruined it a bit (you’ll see if you look closely at my forefinger and thumb), I decided to take the French polish off and see what they looked like with a nice pink on them. I think they look better and not quite as stubby as they did with the French polish, which I think suits a longer nail best (or perhaps a thinner more elegant looking hand hehe!).

Wednesday 16 February 2011

Lilash Eye Serum


Lilash Eye Serum has been one of those “I’m sure it doesn’t really do what it says but I’ll try it anyway” products that has ended up surprising me by actually working! I should probably start by saying that it costs at least £99 so it’s not cheap, and I bought it with some Christmas money over a year ago thinking I would probably be disappointed but at least my curiosity would be satisfied.

I have tried and tried with false eyelashes, and I don’t have the dexterity or patience with them at all, not to mention that I feel like I look slightly drag queenesque when I do actually manage to get a pair to stay on! So you can see the temptation of a serum you just brush on nightly and it produces long lushes lashes in 4-6 weeks….

Yeh right says Kaz, but unbelievably, this product really does work. I wish I’d taken a picture of my eyelashes before starting to use the stuff, hindsight is a wonderful thing isn’t it. I have a bit of a weird way of knowing that they have grown quite a bit though – I get oily skin daily (what’s that to do with eyelashes I hear you cry, but bear with me). What I have noticed now is that my upper eyelashes actually deposit mascara onto my eyes by the end of the day (I’m assuming the oil grabs it) where the lashes are now long enough to be touching my eyelid. I hope that makes sense. I told you it was weird!

It’s really simple to use – the brush is like an eyeliner brush and you sweep it along your lash line once nightly after you’ve taken your make up off, and leave it to do it’s thing. The only slight downside I would say is that my eyelids have been a bit red and sensitive since using it, but as I wear an eye base everyday anyway, it wasn’t a deal breaker for me. I’ve literally only just ran out of it too, so it lasts about a year (taking into account I don’t always remember to use it!).

Now that I’ve run out, I’m going to try a cheaper version called Rapid lash, that I bought on Amazon for £27. I’ll let you know how they are looking in 4-6 weeks. Fingers crossed! J Here is the before and after photos from the Lilash Website.


Tuesday 15 February 2011

My current Skincare regime

My current Skincare regime  

Johnson’s gentle eye make up remover – this is brilliant stuff that takes off any amount of eye make up you care to layer on, waterproof or otherwise. The bottle is great as it has a flip top lid, and at £3.05 from boots, it’s a bargain!

Johnson’s nourishing cleansing lotion – feels quite cooling on the skin, is thick and creamy and does the job nicely. Johnson’s cleansing lotion comes in “Refreshing” for normal skin and “Nourishing” for dry skin. I first used the Refreshing version as I have oily skin, but it seemed to take ages to take my make up off and felt like it was dragging my skin. This is much more moisturizing but not greasy, so no problem. Another bargain at £3.05 again.

RoC Perfercting Toner – from a toner I’m looking for something that will sweep the last remnants of cleanser and dirt away, and that can also be swept over eyes, for that perfectly clean feeling, and this is exactly what I get from this toner. Most toners I have tried feel like not much more than water! At £7.14 though and not lasting very long, I’m keeping my eyes and ears open for a replacement….

Zenmed Oil Free Moisturizer SPF 30, or Vichy Normaderm Hyrdating Care (Day)

If I know I’m going to be outside like wandering round the shops for example, be it winter or summer, I use Zenmed Oil Free Moisturizer SPF30 under my make up. It’s nice and matt which in my experience is hard to find to get an SPF of 20, never mind 30. Hopefully this will help hold back the wrinkles for a while longer :0)

On work days or other days I know I will barely see the outside world,  I use my new found love, Vichy Normaderm as described in my previous blog.


Chanel  Hydramax+ Active Moisture Fluid (Night) or Normaderm Night

Normaderm night is my usual moisturizer, but I occasionally treat myself to Chanel Hydramax+ Active Moisture Fluid and although it’s a day cream, I like to use it as a night cream. Personally, I think it’s works for both. It feels really fresh and light yet very moisturizing, and has a really fresh decadent scent. As it’s £43.92, you can see why it’s only an occasional treat rather than a daily essential.

Thursday 10 February 2011

Vichy Normaderm

Vichy Normaderm Tri-Activ Anti-Imperfection Hydrating Care & Vichy Normaderm Night


I can’t say enough good things about these 2 moisturizers just now. Where have they been all my life?!

The Normaderm -Activ Anti-Imperfection Hydrating Care is a day cream and feels beautifully silky going on, is smooth and matt pretty much immediately, and gives skin a really lovely ready for make up feel. I have oily/combination skin and need something that isn’t too greasy, but usually this means that I get hardly any moisturization from the product. This however feels like its feeding skin as well as keeping the shine at bay. You really have to feel it to believe it.

The Normaderm Night doesn’t have exactly the same silky smooth feel, but feels ever so slightly grainy(which is strangely nice!) and more moisturizing again. It too goes on smooth and doesn’t feel too tacky but is much thicker than the day cream.

The day cream is £11.74 and the night cream £ 12.77, both from Boots, which isn’t bad in my opinion. The only slight disadvantage is that the day cream has no built in sun protection so you need to get that elsewhere. (I get it from my foundation).

Definitely helps with those pesky pimples and open pores too :0)


Tuesday 8 February 2011

Concealer Hunt!


You will notice from my posts that my cosmetic choices are an eclectic mix of both low and high end products, and today’s post concentrates on the lower end of the market as is usually the case at the beginning of  my search for a new product.

Thus far, I have been using a foundation as a concealer, and brilliant as it is, it’s just slightly too thick in consistency so doesn’t blend seamlessly into my actual foundation. I’m using concealer more and more to cover new and not so interesting flaws so this new wonder product I seek needs to be quite a multitasker – I need to cover thread veins around my nose, redness on my eyelids (probably from the eyelash builder I use which is fab and I’ll review at another time), not to mention the odd blemish. Oh and I also want it to cover under eye darkness, I don’t want much from one product eh?!

I bought 4 products as per the picture above, and below is a picture of the colours on my hand – I’ve reviewed them in the same order as the swatches from top to bottom, and here is how I got on:


Gosh Touch Up Concealer in 1 – the little brush is very handy and I like that this comes in a very pale shade that’s not too pink. The first problem I had with this is that it really stung when I put it on my eyelids, not a great start! However, apart from that I did find this a good product for covering redness and dark circles etc, but not good for covering blemishes at all – too thin in consistency.

It lasted really well through the day and certainly brightened the eye area. I won’t be repurchasing this product due to the stinging but I would recommend it to anyone that doesn’t have sensitive skin and doesn’t need the spot coverage.

L’Oreal Infallible Concealer in 01 Vanilla – Creamy and easy to blend but with great staying power. Although it didn’t fade, it did noticeably sink into the creases in my eyelids by lunchtime. For me, the coverage from this is way too light and you need to layer quite a bit to cover any redness or blemishes.

 Maybelline Superstay 24hr Concealer in 2 Beige Clair – you’ll note from the swatch that this is a slightly darker shade than the rest as I bought one colour down from the lightest – my usual MO is to buy the lightest colour possible as all the others are usually too dark, but this looked like it might be a nice “light but not too light” one so I decided to live life on the edge and give it a go :0)

This is my favourite concealer by far but unfortunately there was still a slight stinging on my eyelid area. That aside, it’s the perfect shade with a yellow base but still very light and seems to blend well yet dry fast. It also visibly brightens nicely.

It lasted through the day with no creasing on the eyelid area, and no fading, and it did a good job of covering a few little spots too. I would highly recommend this to anyone that doesn’t have sensitive skin and isn’t looking for an ultra light colour.

Rimmel Stay Matte Dual Concealer in 010 ivory – it’s a cool concept of a concealer with a green coloured inner strip to mask redness and treat spots at the same time. A creamy consistency that’s easy to blend and I’d say a medium coverage. It does stay Matte but it didn’t have great staying power for me and needed a reapplication by mid afternoon. Didn’t overly impress or disappoint either way. I have a bit of a blah feeling about it!

So, the conclusion is….. I will be sticking to my foundation concealer for now while the hunt continues! Oh, and that foundation is Estee Lauder Maximum Cover by the way.
I may try Benefit Boi-ing at some point in the future but am slightly nervous about it being too creamy for my oily skin. If anyone has any recommendations for a good concealer, I’d be delighted to hear about it!